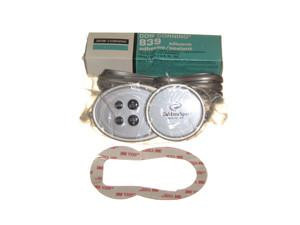
Description
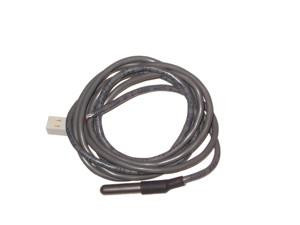
2004 Caldera Spas Aspire Topside Control Panel Auxiliary Kit, Aux Control Head, (Music Spas Only) Removing the Auxiliary Control Head 1. Turn the power off to the spa. 2. Remove the equipment compartment door. 3. Access the control box. 4. Disconnect the auxiliary control heads modular connector/ribbon cable from the control box, refer to the appropriate Electrical Schematic for its location. 5. In some cases, it maybe necessary to remove the most accessible panels from the spa so that there is access from the control box to the auxiliary control head. On the bartop: 1. Make sure the water line is below the bottom of the control head. 2. Using a thin metal blade, i.e. a putty knife, gently pry around the edges of the control head. 3. For 2002 mid 2003 units remove the side panels. Disconnect the cable from the control box and, starting at the box, remove the entire cable with the control panel. IMPORTANT AUXILLARY PANEL MUST HAVE AT LEAST 6 INCHES OF CABLE ATTACHED For mid 2003 Curr units - Disconnect the cable from the control box and attach a 20 string to the connector. At the control head, gently pull the cable and string through the flex hose. 4. After removing the control head, clean off any gasket material or silicone from the opening in the shell. Installing the New Auxiliary Control Head 1. Align the panel up with the opening. - For 2002 mid 2003 units Using the new cable and masking tape, place it along between the spa lip and the paper. For the corners, it may be necessary to attach it to a dowel with a piece of tape and poke it through the paper. - For mid 2003 Curr units - Attach a 20 string to the connector of the new control head. At the control box, gently pull the cable and string through the flex hose. 2. Rest the control panel in the location where it will be installed. 3. Connect the cable into the appropriate receptacle in the control box; refer to the Electrical Schematic for proper location. 4. Apply power and verify that the following are operative and make sure that the control panel is operating by running all functions. Music System ◦Switch between spa mode and music mode Indicator Lights Locking Features Jets Light Set Temperature 5. Locate the gasket in the kit and fit it over the control head so that it can rest on the bartop. 6. Dry fit the gasket. The masking tape can but used to outline proper placement. 7. Remove the remaining backing from the gasket and adhere it to the bartop. 8. Place a 1/8 bead of clear silicone to the lip area of the control panel. 9. Fit the panel onto the gasket and press down evenly to secure in place. 10. Use the clean towel or rag to remove any excess silicone from the area. 11. wait 24 hours before using the spa to allow the silicone to dry completely. 2008 Watkins Manufacturing Corporation. CDR is a trademark of Watkins Manufacturing Corporation
View AllClose


